So, I’ve been on the no dairy, no soy, no sugar, exercise every day ‘lifestyle change’ for about a month now… how’s it going?

No soy: almost perfect.  The only time I had any was when we were in Arkansas a few weeks ago.  We were renting a cabin from a really wonderful family, and breakfast was provided.  I’d given him the list of dietary restrictions with some trepidation (no meat and no dairy, I didn’t bother with the rest), and they’d gone out of their way to make versions of everything that I could eat.  This was right after an ice storm that had left most of their neighbors without power (some people still don’t have it!), and when he showed up on the second day with a plate of soy sausages (from who knows where), I didn’t have the heart to turn it down.  So I had one.  And it was tasty.

No dairy: Again, almost perfect.  I did slip and have a slice of pizza at 2am once.  And I’ve had some dairy while I was tasting recipes (butter), but I haven’t deliberately eaten any other than that.

No sugar: ha!  Well, not so much.  Too much ‘tasting’.  Especially of the World Peace Cookies.  When something is bite-sized, it’s calorie-free, right?

Exercise:  Um, right.  How about 3x/week?  Still working on that one.

One of the things I’ve been trying to do to accommodate all of these changes is to find things to make that I can eat without (much) guilt.  So when I saw the recipe for these muffins, I had to give them a go.

The lovely Bittersweet had posted this recipe, to which I made a few alterations.
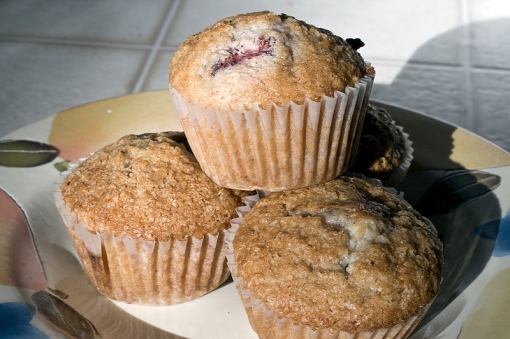
Strawberry Muffins - vegan!

Strawberry Muffins - vegan!

Strawberry Muffins (vegan), aka Love Muffins
Adapted from Bittersweet

1 ½ cups AP Flour (White Lily)
½ cup Sugar
¼ Teaspoon Salt
1 Teaspoon Baking Powder
1 Teaspoon Baking Soda
¾ Cup Coconut Milk (although the original recipe calls for Vanilla Soymilk)
1/3 Cup Canola Oil (next time I will try this with unsweetened applesauce to cut fat)
1 Teaspoon Vanilla Extract
1 Cup Frozen Strawberries, Thawed (You may want to chop these up a little smaller if they’re whole frozen strawberries, or only in big chunks.  My muffins ended up with big holes where the strawberry had started out but then baked down into something smaller).

Preheat your oven to 375 degrees and grease muffin tins.

Begin by mixing together your dry ingredients (Flour, sugar, salt, baking powder and soda.) Gently stir in milk, oil, and vanilla but be careful not to over-mix. A few lumps are okay! Fold in your thawed strawberries and pour batter into muffin tins, ¾ of the way to the top. Slide your filled tins into the oven and cook for 15 – 20 minutes, depending on your oven. Test for doneness by inserting a toothpick; When they’re ready to come out, the toothpick will remain dry.

Fresh out of the oven, they are still young and impressionable, so don’t try to remove them immediately or you will end up with smushed, dented muffins! Allow to sit for at least 10 minutes inside their cooking vessel. Enjoy with someone you love.

—-

These were incredibly moist and airy and tasty, and lasted so for a couple of days (they didn’t last past that!)  I would like to find a way to cut the sugar content back – I thought of using Agave syrup, but then I figured that the wet/dry ratio would be completely out of whack – any suggestions?
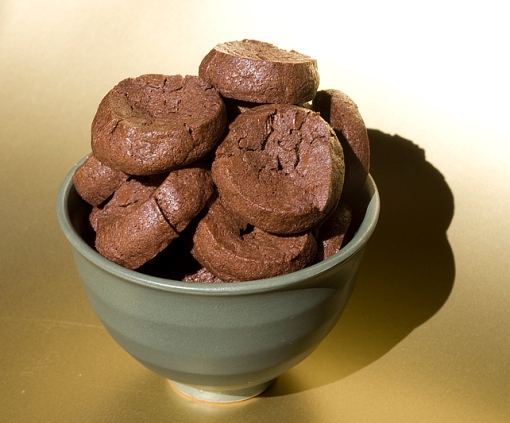
World Peace Cookies

World Peace Cookies

When these cookies started going around the blogosphere again, I decided to give them a try.  I’ve been thinking about a good chocolate shortbread-type cookie to use as part of a plated dessert at the cafe, so when I made them I made the rolls of dough less than an inch wide.

They turned out perfect for what I intended – they are crisp, intensely chocolately, and have a little salty hint to them that just accentuates the chocolate.  Absolutely delicious, and as small as they came out, perfect bite-size.  I’ve suggested to the cafe owner that she give one out with every drink (they’ll go with either tea or wine, I imagine), and I think she’s going to do it.  As small as I’ve made them, I can get almost eighty out of one batch of dough.  Not too shabby!

Dorie Greenspan’s World Peace Cookies
Baking: From My Home to Yours, Dorie Greenspan

1 1/4 cups all-purpose flour [I used White Lily]
1/3 cup unsweetened cocoa powder
1/2 teaspoon baking soda
1 stick plus 3 tablespoons (11 tablespoons) unsalted butter, at room temperature
2/3 cup (packed) light brown sugar
1/4 cup sugar
1/2 teaspoon fleur de sel or 1/4 teaspoon fine sea salt [I used 1/4 tsp of generic ‘fine sea salt’]
1 teaspoon vanilla extract
5 ounces bittersweet chocolate, chopped into chips, or a generous 3/4 cup store-bought mini chocolate chips [I happened to have mini chips on hand, so I used those]

Makes about 36 cookies. [or a lot, lot more if you make them tiny!  🙂  ]

Sift the flour, cocoa and baking soda together.

Working with a stand mixer, preferably fitted with a paddle attachment, or with a hand mixer in a large bowl, beat the butter on medium speed until soft and creamy. Add both sugars, the salt and vanilla extract and beat for 2 minutes more.

Turn off the mixer. Pour in the flour, drape a kitchen towel over the stand mixer to protect yourself and your kitchen from flying flour and pulse the mixer at low speed about 5 times, a second or two each time. Take a peek — if there is still a lot of flour on the surface of the dough, pulse a couple of times more; if not, remove the towel. Continuing at low speed, mix for about 30 seconds more, just until the flour disappears into the dough — for the best texture, work the dough as little as possible once the flour is added, and don’t be concerned if the dough looks a little crumbly. Toss in the chocolate pieces and mix only to incorporate.

Turn the dough out onto a work surface, gather it together and divide it in half. Working with one half at a time, shape the dough into logs that are 1 1/2 inches in diameter. [or smaller] Wrap the logs in plastic wrap and refrigerate them for at least 3 hours. (The dough can be refrigerated for up to 3 days or frozen for up to 2 months. If you’ve frozen the dough, you needn’t defrost it before baking — just slice the logs into cookies and bake the cookies 1 minute longer.)

GETTING READY TO BAKE: Center a rack in the oven and preheat the oven to 325 degrees F. Line two baking sheets with parchment or silicone mats.

Working with a sharp thin knife, slice the logs into rounds that are 1/2 inch thick. (The rounds are likely to crack as you’re cutting them — don’t be concerned, just squeeze the bits back onto each cookie.) Arrange the rounds on the baking sheets, leaving about 1 inch between them.

Bake the cookies one sheet at a time for 12 minutes [I used 10 for the little ones]— they won’t look done, nor will they be firm, but that’s just the way they should be. Transfer the baking sheet to a cooling rack and let the cookies rest until they are only just warm, at which point you can serve them or let them reach room temperature.

SERVING: The cookies can be eaten when they are warm or at room temperature.

STORING: Packed airtight, cookies will keep at room temperature for up to 3 days; they can be frozen for up to 2 months.  I can also attest from (ahem) personal experience that they’re still plenty tasty after 4 or 5 days, when kept in an airtight tin.

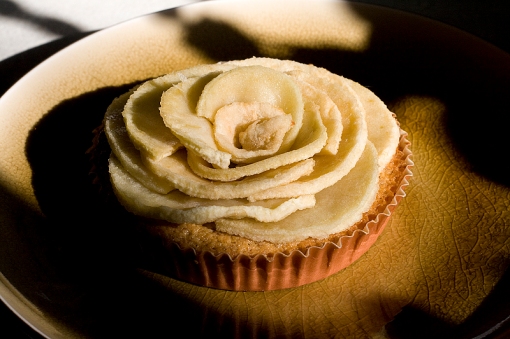
A few weeks back, the lovely Tartelette posted a delicious-looking recipe for these tartelettes.  How scrumptious!  But I didn’t plan on making them anytime soon… until I realized that I needed to put together some kind of apple tart to take with me to a dessert-tasting at the cafe I’ll be baking for (which is opening in TWO WEEKS!  Hurray!).  And I needed it… for the next day.  Eek. I pulled this one up and saw that I had everything I needed, so away I went!

Apple Frangipane Tartlet

Apple Frangipane Tartlet

Apple Frangipane Tartelettes
(recipe from Tartelette)

Serves 8 (3″ tarts; makes 6 if you use 4″ tart pans, as I did)

Sable Dough:
1 stick (115 gr) butter, at room temperature
3/4 cup (93 gr) powdered sugar
1 large egg
1 1 /2 cups (188gr) flour
2 tablespoons (20 gr) cornstarch (makes for a lighter crumb)
pinch of salt

In a mixer, cream the butter and sugar together until light and fluffy. Add the egg and mix until combined. Add the flour, cornstarch and salt and mix briefly to incorporate. Dump the whole mixture onto a lightly floured board and gather the dough into a smooth ball. Do not work the dough while in the mixer or it will toughen up. Flatten the dough into a disk, wrap it in plastic wrap and refrigerate for an hour.

When the dough is nice and cold, roll it out on a lightly floured board or in between the sheets of plastic. You will need half the amount of dough to make the tartelettes. The other half can be kept in the fridge for up to 5 days or frozen, well wrapped for up to 3 months. Cut out rounds with a 3 inch pastry ring. Place them on a baking sheet lined with parchment paper and bake at 350F for 8-10 minutes. Let cool.

[Since I don’t have 3″ tart rings, I put the dough circles into my paper tart liners and baked it in there.  It came out fine.]

If For the Honey Roasted Apples:
4 medium apples
1/2 cup honey

Preheat the oven to 350F. Peel core and cut the apples in thin slices. Lay them on a couple of parchment paper lined baking sheets and drizzle at will with the honey. Bake for 10-15 minutes until golden. Let cool.

[Next time, I’d add another apple.  I was running a little short on ‘petals’ by the time tart #6 rolled around]

For the Frangipane Cream:
1 stick (115 gr) butter, softened
1/2 cup (100 gr) granulated sugar
1 cup (100 gr) ground almond
seeds from one vanilla bean or 2 teaspoons vanilla paste or extract
2 eggs
1/4 cup (60gr) heavy cream

Place the butter, sugar, almond powder, vanilla bean seeds and the eggs in a large bowl and whisk until smooth (can also be done in a food processor). Add the cream but stir in it instead of whisking not to emulsify it or it will rise while baking. Refrigerate for 30 minutes. Place 8 baked rounds of dough in 8 pastry rings, divide the cream evenly among the rings and bake 20 minutes at 350F. Let cool. Once cooled, remove the tarts from the rings and arrange the apple slices decoratively on top.

Here’s a picture of the tart before arranging apples on top:

Naked frangipane tart!

Naked frangipane tart!

And another shot of it all dolled up:

I love the light in this one

I love the light in this one

Verdict?  These were moderately simple to make, and wonderfully tasty. They were a hit with Jeff and his friend H, and most importantly, with the owner of the cafe!  I think these will be going into the case, for sure.

Unglazed cookies, prior to decorating

Unglazed cookies, prior to decorating

I first tried this recipe a few weeks ago, looking for an excuse to use some of my antique Springerle molds, and was blown away by it.  It’s fantastic.  It’s spicy and soft and chewy and lasts forever, and holds up in the fridge and freezer, and just.. wow! I found it via No Special Effects, who adapted it from a recipe in Tartine.

Christmas dinner?

Christmas dinner?

I’m here in Arkansas for Christmas, with my husband’s son (4.5 years old) and his parents and grandparents, and wanted to make something special for them – so brought this recipe along.  We made the dough yesterday, rolled out and baked today, and decorated while waiting for our xmas eve dinner (we fly out on the 25th, so we’re having our official ‘christmas’ tomorrow – it’s not like he can read a calendar yet, after all!).

A plate full of deliciousness

A plate full of deliciousness

I frosted some with royal icing, and Isaac helped with sprinkles and such:

The middle one says 'Isaac'. He wrote it himself.

The middle one says ‘Isaac’. He wrote it himself.

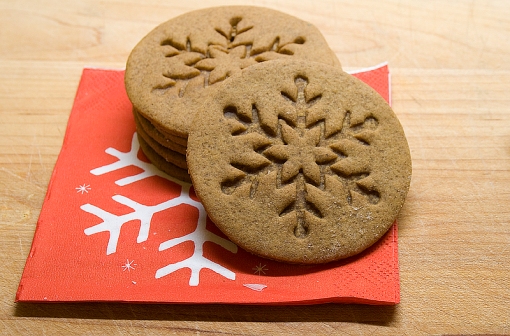
I didn’t bring my molds, and had asked my mother-in-law if she had a snowflake cutter, as I was just really jonesing to make snowflakes.  She didn’t, but when she and Isaac were at the store they found a set of Wilton cutter/imprinters that were just perfect!  You can use them with or without the cutter – they make 3″ rounds, and there’s a plunger that you can attach an imprinter to – it comes with a snowflake, a snowman, and a christmas tree.  Pretty nice!  I couldn’t find it on the web, so no pictures of the set, unfortunately.

Snowflakes in the middle; Snowmen on the edges

Snowflakes in the middle; Snowmen on the edges

Soft Glazed Gingerbread

Posted by No Special Effects, adapted from Tartine.

* 225g (2 sticks or 1 cup) unsalted butter, at room temperature
* 1 tablespoon cocoa powder
* 4 teaspoons ground ginger
* 1-1/2 teaspoons ground cloves
* 2 teaspoons ground cinnamon
* 1/2 teaspoon baking soda
* 1 teaspoon salt
* 1-1/4 teaspoon freshly ground black pepper
* 170g (3/4 cup + 2 tablespoons) granulated sugar
* 1 large egg
* 155g (1/2 cup) blackstrap or other dark molasses
* 2 tablespoons light corn syrup
* 525g (3-3/4 cups) all-purpose flour

In a large mixing bowl, add the butter, then sprinkle the cocoa, ginger, cloves, cinnamon, bakind soda, salt, and pepper evenly over it. Beat the mixture until creamy. Slowly add the granulated sugar and mix on medium speed until smooth, scraping down the sides of the bowl occasionally.

Add the egg and beat until well-combined. Add the molasses and corn syrup and beat until well-combined, scraping down the sides of the bowl as needed.

Sift all the flour over the mixture and stir in with a strong spoon or rubber spatula until well-combined and no traces of flour remain. You could also use the paddle attachment on a stand mixer, beating on low speed until the dough pulls away from the sides of the bowl and no traces of flour remain. Place the dough on a large piece of plastic wrap and press it into a rectangle about an inch thick, cover, and refrigerate overnight.

Preheat the oven to 175°C (350°F). Line a sheet pan with parchment.

If using a single springerle mold: Unwrap the dough and place on a floured work surface. Roll out the dough to 1/3 inch thickness, lightly dust the top with flour, and press the mold(s) all over the dough. Cut out the shapes with a small knife and transfer to the baking sheet, about 1 inch apart.

If using a springerle rolling pin: Lightly dust the lined sheet pan with flour and place the dough on top. Roll into a rectangle about 1/3 inch thick with a regular rolling pin, lightly dust with flour (I just brush my floury hands over the dough), then roll over it again with the patterned pin, applying enough pressure to ensure a clear impression. Trim the sides of the entire slab with a small knife, but there’s no need to cut out the individual cookies at this point.(although I did).

Bake the cookies until lightly golden along the sides but still soft to touch in the center, about 7 minutes for already-cut cookies or 15 minutes if you used a patterned rolling pin and are baking a giant slab of cookies. When done, let the cookies cool in the pan for about 10 minutes (they will set further as they cool). While waiting, prepare the glaze:

* 115g (1 cup) confectioners’ sugar
* 2-3 tablespoons water

Sift the confectioners’ sugar into a small mixing bowl. Add 2 tablespoons water and whisk until smooth. While the cookies are warm, evenly brush a light coat of glaze on top. If the details are obscured too much, whisk in the remaining tablespoon of water to the glaze and continue. If you’ve used a patterned pin to make a large slab of cookies, when the glaze has hardened, use a small, very sharp knife to cut it into the individual cookies.

Or, skip the glaze and decorate with royal icing.

[edit: The cookie cutter set I used is available here; it’s made by Wilton and is super-easy to use and clean up!]

Magic in the Middles, stacked up nice and high

Magic in the Middles, stacked up nice and high

My mother-in-law can’t have peanuts, so although she’s a wonderful cook and makes quite tasty desserts, she doesn’t make anything with peanut butter as a general rule.  Since my father-in-law loves peanut butter, I try to make and bring things for him especially every now and again.  Last month it was the Peanut Butter Crinkles; this month The Recipe Girl inspired me to make Magic in the Middles (taken from The King Arthur Flour Cookie Companion) – I mean, chocolate cookies wrapped around a peanut-butter filling?  What’s not to like? Besides, she has awesome pictures.

Finished cookie

Finished cookie

I used Demerara sugar to roll them, which gave them a pleasingly crunchy exterior.  These travelled extremely well (tossed around in our luggage to Arkansas), and are still being enjoyed.  A definite win!

Magic in the Middles

from The Recipe Girl, adapted from the KA Flour Cookie Companion

DOUGH:

1½ cups (6¼ ounces) unbleached all-purpose flour (I used White Lily)
½ cup (1½ ounces) unsweetened cocoa powder
½ tsp baking soda
¼ tsp salt
½ cup (3½ ounces) granulated sugar (plus extra for dipping, or you can use Demerara or another large-grain sugar)
½ cup (4 ounces) light brown sugar, packed
½ cup (4 ounces or 1 stick) unsalted butter
¼ cup (2 3/8 ounces) smooth peanut butter (I used Jif)
1 tsp vanilla extract
1 large egg

FILLING:
¾ cup (7 1/8 ounces) smooth peanut butter (I used Jif)
¾ cup (3 ounces) powdered sugar

1) Preheat oven to 375°F. Lightly grease (or line with parchment) two baking sheets.

2) Prepare dough: In a medium bowl, whisk together flour, cocoa, baking soda and salt. In another medium bowl, beat together sugars, butter, and peanut butter until light and fluffy. Add vanilla and egg, beating to combine, then stir in dry ingredients, blending well.

3) Prepare filling: In a small bowl, stir together peanut butter and powdered sugar until smooth. With floured hands, roll the filling into 26 one-inch balls.

4) Shape cookies: Break off about 1 Tbsp. of the dough, make an indentation in the center with your finger, and press one of the peanut butter balls into the indentation. Bring the dough up and over the filling, pressing it closed; roll the cookie in the palms of your hand to smooth it out. Repeat with remaining dough and filling.

5) Dip the top of each cookie in granulated sugar and place on prepared baking sheets about 2 inches apart. Grease the bottom of a drinking glass and use it to flatten each cookie to about ½-inch-thick.

6) Bake cookies for 7 to 9 minutes, until they’re set. Remove them from the oven and cool on a rack.

Yield: About 26 cookies

Bourbon Balls

Bourbon Balls

One of the things I love about food and desserts is that they can so strongly link us to certain places and times.  Pumpkin pie is Thanksgiving, as is Green Bean Casserole, at least the Thanksgiving of my childhood.  Nowadays I’m spending Thanksgivings in the South, and there seems to be a lack of appreciation for this traditional dish down here.  It’s alright; I’ve come to appreciate the sweet potato casserole that my mother-in-law makes, with the pralined pecan topping (utterly delicious), even if I still don’t really get it about cornbread.

One of the desserts that I’ve come to associate with Christmas is these Bourbon Balls.  They’re something my mother-in-law also usually makes, and they’re little spheres of heaven.  Crunchy on the outside from the demerara sugar, dense and sugary and boozy on the inside.  One can last you for ten minutes, at least.  They’re not really something you just pop into your mouth.  You take nibbles.  You savor.

Making them is a very simple process, at least it is with a food processor.  I spent years and years without one, or the past few years with a very small (2-3 cup) processor, doing crumbs in batches.  This year, the bourbon balls took all of about ten minutes to put together, and another 10-15 to scoop and roll in sugar.  The payoff, though?  A whole lotta tasty bourbon goodness. Yum.

Bourbon Balls

Adapted from the Williamsburg Cookbook

8 oz semisweet chocolate, finely chopped
60 Nilla Wafers (about 8 oz)
1 cup finely chopped pecans
3/4 cup granulated sugar
1/2 cup bourbon (I used Maker’s Mark)
1/4 cup light corn syrup

Raw or Demerara Sugar for rolling

Melt chocolate over boiler or nuke it.

Grind nilla wafers in food processor.  Add pecans and sugar, pulse several times.  Pour into large bowl.  Add chocolate, bourbon, corn syrup, and stir to mix thoroughly.

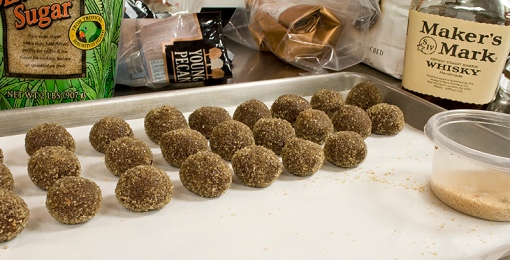
All mixed together, waiting to be made into balls

All mixed together, waiting to be made into balls

Form into balls (I used a #50 scoop), roll in sugar, chill to set.  Makes zillions (about 60)

Not quite halfway through rolling...

Not quite halfway through rolling…

These, along with Vanilla Sugar‘s Spicy Chocolate Fudge with Pecans (which, while not terribly spicy, was very tasty nonetheless) and some leftover caramels, made up my holiday boxes this year. Yum!

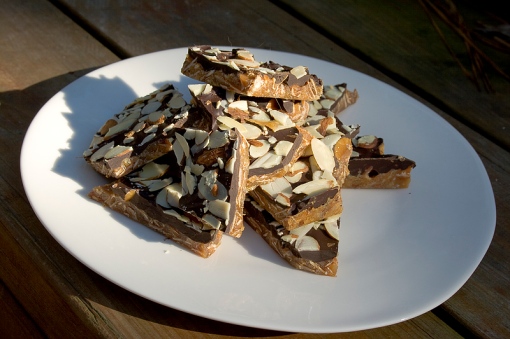
Crunchy almond brittle

Crunchy almond brittle

The other day I had someone ask me if ‘those peanut butter things’ would travel well (the Chocolate Peanut Butter Mousse Tarts). I had to say that no, they probably wouldn’t, but it depends on how far he was going, maybe. “Singapore – it’s about a 30-hour flight”.

No, definitely not.

We did some brainstorming – I suggested things like maybe the Pecan Pralines, or bourbon balls, or I could make up a batch of Almond Brittle with chocolate…

That one, he says.

It’s been a few years since I’ve made this, but I used to make it all the time back when I lived in Addison. It’s a recipe from Marcel Desaulniers’ Death by Chocolate, and apparently it’s actually called Chocolate Honey Almond Crunch.  For some reason I never can remember the name correctly, so a long time ago I just wrote it on the inside cover of the book, with the page number, so I didn’t have to try and look it up under Almonds, or Crunchy, or whatever it’s under.

The thing that threw me when I went to make it was that it called for two 9×13 pans. I didn’t recall ever making it in two pans before – I’m pretty sure I just used a jelly roll pan (10×15). Well, maybe I should do it like the recipe says, maybe I’m mis-rembering…

(Always trust your first instinct, I think is my lesson here)

It didn’t turn out quite like I remembered it before – using a single pan (when the time came to pour it into the two prepared pans it just didn’t seem like enough, so I wimped and used one) threw off the cooking time, and I ended up overcooking it a little in the oven (as it was hard to tell the color, since it was so thick). I don’t think I used to use quite so many almonds, either – or maybe they spread out more in the bigger pan. Next time, I’m doing it in the jelly roll pan.

But all that aside, it was still the same wonderful flavor, and crunchiness. And right at the end, when you think it’s going to simply melt away, the honey shows up in a last bit of chewiness. The dark chocolate and almonds play nicely with the brittle, the flavors are wonderful… it’s just really great stuff.

Chocolate Honey Almond Crunch

From Death by Chocolate, Marcel Desaulniers

Ingredients

4 c Sliced almonds 1/2 c Granulated sugar
1/4 c Honey (I used sourwood)
1/2 c Water
6 oz Unsalted butter 4 oz Unsweetened chocolate;
8 oz Semi-sweet chocolate;

Equipment: 2 9×13 pans (I recommend one 10×15 pan)

Instructions

Preheat the oven to 325F degrees.

Toast 2 cups of almonds on a baking sheet in the preheated oven until golden brown, about 12 to 14 minutes. Remove the almonds from the oven and allow to cool to room temperature. Transfer the almonds to a large dish or other suitable container and set aside until needed.

Melt the butter in a 2 1/2-qt saucepan over low heat, stirring constantly as it melts so it does not simmer or boil. As soon as the butter is completely melted, add the sugar, water, rum, and honey. Increase the heat to medium high. Heat the mixture to a temperature of 220F degrees, stirring constantly.

Add the untoasted almonds and continue to heat and stir until the mixture reaches a temperature of 225F degrees.

Evenly divide the honey-almond mixture between the 2 baking sheets (or one bigger sheet). Place the baking sheets on the top and middle shelves of the preheated oven and bake until the mixture is evenly caramelized, about 24 to 26 minutes. Rotate the baking sheets from top to bottom about halfway through the baking time.

Remove from the oven and allow to cool for 5 minutes.

Combine the semi-sweet and unsweetened chocolate pieces and evenly divide and sprinkle over the surface of the caramelized honey-almond mixture. Allow to stand for 5 minutes. Use a spatula to spread the chocolate over the mixture. Evenly divide and sprinkle the toasted almonds over the chocolate.

Place the baking sheet in the freezer for 20 minutes. Remove from the freezer and break into irregular pieces. Store in a sealed plastic container in the freezer or refrigerator. Yields: About 2 3/4 pounds

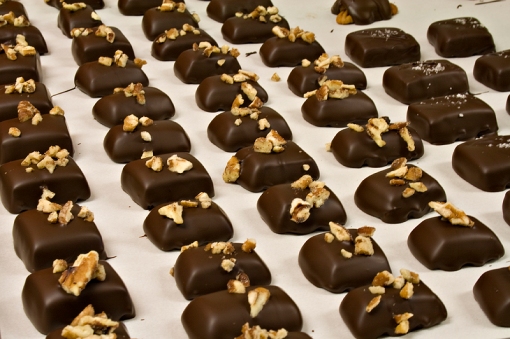
Lots and lots and lots of caramels:

Chocolate-covered caramels

Chocolate-covered caramels

Mostly apple cider, but you can see some fleur-de-sel peeking out in the rear.

Here’s a closer shot:

Fleur de Sel Caramel

Fleur de Sel Caramel

Mmmmm.

Oh, the recipe, you say?

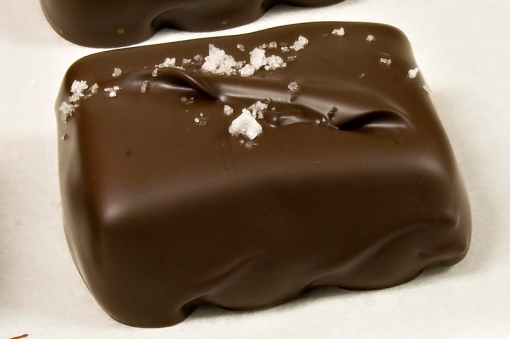
Essentially, I use the Fleur de Sel Caramel recipe from Epicurious.  I kick the fleur de sel up to a Tablespoon, plus sprinkle some on the caramel after pouring it out, plus some on the finished chocolates, because, well, FLEUR DE SEL AND CHOCOLATE. yummy.  For notes on technique, and all the lessons I’ve learned, check out the post on Apple Cider Caramels.

Also, there were pralines:

Pecan Pralines

Pecan Pralines

And Buckeyes (apparantly, I forgot to snap a picture when I’d covered them in chocolate.  So, here you have it: NAKED BUCKEYES.  Hide the children, not for the sensitive or delicate, etc.):

Nekkid Buckeyes (definitely up to no good)

Nekkid Buckeyes (definitely up to no good)

What are Buckeyes, you say?  (What are you, Southern?)

Buckeyes are a tasty, crunchy peanut-butter and rice krispie treat dipped in a combination of milk and dark chocolate.  They are addictive.  You cannot eat just one.  They are fluffy and crunchy and sweet and chocolatey, and it’s a darned good thing I took all of the leftovers to the office holiday party, let me tell you. The recipe came from a good friend, and is dead simple.  There’s something similar here, but they don’t use the Rice Krispies, which I think really make it something awesomely special (my version calls for equivalent measurements of rice krispies and peanut butter, i.e. 3 cups).

So, that’s what’s been happening! Don’t forget, you have until Sunday the 13th to place your holiday orders from SugarPunk (so I have enough time to bake and ship/deliver before we leave on the 19th for lovely Arkansas and then Chicago).

Or, you could wait until the last minute and sign up for the Dessert of the Month club (details forthcoming)…

Bourbon Pumpkin Cheese Cake

Bourbon Pumpkin Cheese Cake

The other day, Zoe of Zoebakes made this scrumptious Bourbon Pumpkin Cheese Cake, and I knew I had to have one for my very own (plus, that it would make a very pretty addition to the Thanksgiving spread).

It was (is) DELICIOUS.  I can’t taste the bourbon, nor could anyone else, but I’m sure it’s in there doing something – the flavor is just wonderfully complex and smooth, the texture soft and silky.

The recipe went fairly straight-forwardly, although I decided early on to skip the sugared cranberries and just go with pomegranate seeds instead for the garnish – still pretty and elegant. I also went for the easy way out and made a graham cracker crust, which I think went fabulously with the cheese cake – just the right richness of flavors to complement the pumpkin.

I didn’t use a foil tent to bake it, and ended up with the double prophylaxis of cake strips and water bath, which might be why it took well over an hour to set up enough to do the sour cream layer – but it didn’t crack!  🙂

The biggest gap, I think, was in the removal of the cake.  “Refrigerate for a couple of hours” does not get me from cake in pan (non-springform, mind you) to cake on plate.  I wasn’t falling for that one.  After giving it some thought, I stuck the cake in the freezer for a couple of hours, then rested the bottom in a pan of very hot water for about half a minute, and then carefully upended the cake onto a layer of parchment paper.  Came out smoothly – go me!  Only lost a little bit of the edge to the paper, too.  Thawed beautifully, transported without any fuss, and was enjoyed by many.

Is still being enjoyed by us – there weren’t enough people at Thanksgiving to eat it, the carrot cake, and the chocolate tarts, so we have leftovers.  Time for another party!

Bourbon Pumpkin Cheese Cake

Bourbon Pumpkin Cheese Cake

Bourbon Pumpkin Cheese Cake
By ZoeBakes

Batter

1 1/2 pounds cream cheese at room temperature
1/2 cup brown sugar
1 1/2 cups [4] roasted pumpkin or canned
6 large eggs
2 tablespoons sour cream
1 teaspoon pure vanilla
1 tablespoon bourbon
1/2 cup sugar
1 tablespoon (corn or potato starch)
1 1/2 teaspoons cinnamon
1/2 teaspoon freshly ground nutmeg
1/2 teaspoon ground ginger
1/2 teaspoon salt

Cheesecake topping:
1 cup sour cream
2 tablespoons sugar
1 teaspoon pure vanilla
1 graham cracker crust

Preheat oven to 325° and prepare an 8 by 3-Inch Round cake pan with parchment and the graham cracker crust. [I prebaked the crust for 10 minutes] Set aside.

To prepare cheese cake batter:

Mix together in a stand mixer with the paddle attachment the soft cream cheese and brown sugar, until smooth.
In a separate bowl combine the pumpkin puree, eggs, sour cream, vanilla and bourbon. Slowly add to the cream cheese mixture, scraping down the sides often.
In another bowl whisk together the sugar, starch, spices and salt. Add this to the cream cheese and pumpkin mixture. Beat on medium/low speed until well combined, scraping down the sides often.

Pour into prepared pan. Gently tap the cake pan several times on the counter to bring any air bubbles to the surface.

Bake in a water bath and with a foil tent [as I said, I skipped this step], for about 45-55 minutes or until
set, slightly puffy and no longer wet looking. [It took me more like 70 minutes]

While the cake is baking mix together all the ingredients for the topping, set aside.

Once the cake is fully cooked very gently spread the on the sour cream topping with an Offset Spatula .

Bake uncovered with the topping for an additional 5 minutes.

Remove the cake and allow to cool slowly still in the water bath. Carefully run a thin blade knife around the edge of the warm cake so that it won’t crack.

Put in the refrigerator to cool for at least a couple of hours.  For absolute safety, freeze for a couple of hours before removing from the pan.  After freezing, warm the bottom of the pan briefly to re-melt some of the butter in the crust, and then up-end onto a cookie sheet covered with parchment paper or something else nonstick, and reverse onto your platter or serving dish of choice.

Decorate with pomegranate seeds, cranberries, etc.

Pomegranate seeds on cheese cake

Pomegranate seeds on cheese cake

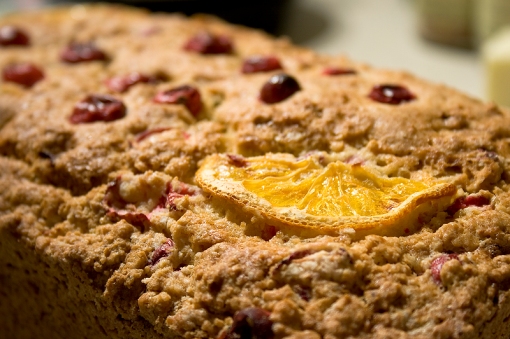
Cranberry-Orange Bread

Cranberry-Orange Bread

People are actually starting to give me money for food!  I am so excited by this development.

Also exciting is that I finally broke down and bought myself a food processor.  I’ve owned a little bitty one for years, but never a large one.  So I got this one. It came Thursday, and I spent all Friday using it to make pie crusts (about 15 so far).  I am IN LOVE.  This is the second-best large purchase I’ve ever made for the kitchen — the first is my beloved Kitchen Aid, which has been going strong for 15 years now, and I expect will for another 15.  I did pick up a secondhand 6-quart for the kitchen, and it handles doubled recipes and bread nicely, but it shall never replace my old favorite in my heart or in my home kitchen. But back to my food processor.  It has two big buttons on the front  – “ON” and “OFF/PULSE”.  The buttons, bless them, are so nice and big and easy to push that when my arms start to get tired of pulsing, I can scoot the machine to the edge of the counter and use my hip.  Ergonomic all the way!

One of the things recently ordered from the business was a loaf of the cranberry-orange bread, so now there are pictures.  One of the things I need to do is go through and bake one of everything on the list so that I can take pretty pictures for the website.  Someday, when I have free time.  Heh.

This is a pretty straightforward quick-bread – the thing to remember about quick breads is that the less you mix them, the lighter the final result will be.  It’s okay to still see flour – by the time you get it all into the pan, it’ll be mixed enough.

Cranberry-Orange Quick Bread
Recipe adapted from this one on recipezaar

Ingredients

* 2 cups all-purpose flour (I use White Lily)
* 3/4 cup sugar
* 1 1/2 teaspoons baking powder
* 3/4 teaspoon salt
* 1/2 teaspoon baking soda
* 1/4 cup butter, softened
* 1 tablespoon orange zest
* 3/4 cup orange juice
* 1 egg
* 1 cup cranberries, chopped (fresh or frozen)

Directions
1.     Grease/spray bottom only of a 8×4 or 9×5 loaf pan.
2.     Combine flour, sugar, baking powder, salt, and baking soda. Add margarine and mix until crumbly.
3.     Add peel, 3/4 c orange juice, and egg; stir until moistened Add cranberries.
4.     Pour batter (it will be thick) into pan and bake until a knife comes clean from the center.
5.     For a 8″ loaf, about 75 min; for a 9″ loaf, about 55-65 min at 350F (watch after about 50 min, depending on your oven).
6.     Loosen sides from pan, remove & cool completely.

Cranberry Orange Loaf

Cranberry Orange Loaf

We’re in Arkansas for the weekend, so no baking, but when I get back, it’s time to make filling for a few dozen pies…